Convio Luminate CMS Summer Release (2011-006)
September 7, 2011
Click one of the following links to learn more about:
Enhancements
Along with rebranding and renaming the product, the Convio Luminate CMS™ Summer 2011 release includes the following new features:
- Redesigned User Interface
Rebranding and redesign of the Luminate CMS User Interface including the Workspace - User-Generated Content
Allow users to submit and display stories, images, and more on your Luminate CMS site - Support for Mobile Devices
Configure your Luminate CMS site to detect and display correctly on mobile devices - Create a New Constituent360 Profile Form
Enable your site so that, when constituent’s sign up, a Constituent360 record is automatically created - Create an Update Constituent360 Profile Form
Enable your site so that, when constituent’s update their profile, their Constituent360 record is automatically updated - Redesigned Form Tool
Create more sophisticated forms with the redesigned Form tool that includes a new “Form Console”
Redesigned User Interface
Along with changing the name of the product, this release includes the following changes to the UI:
For more information, refer to the Administrator User Interface Enhancements Feature Summary document.
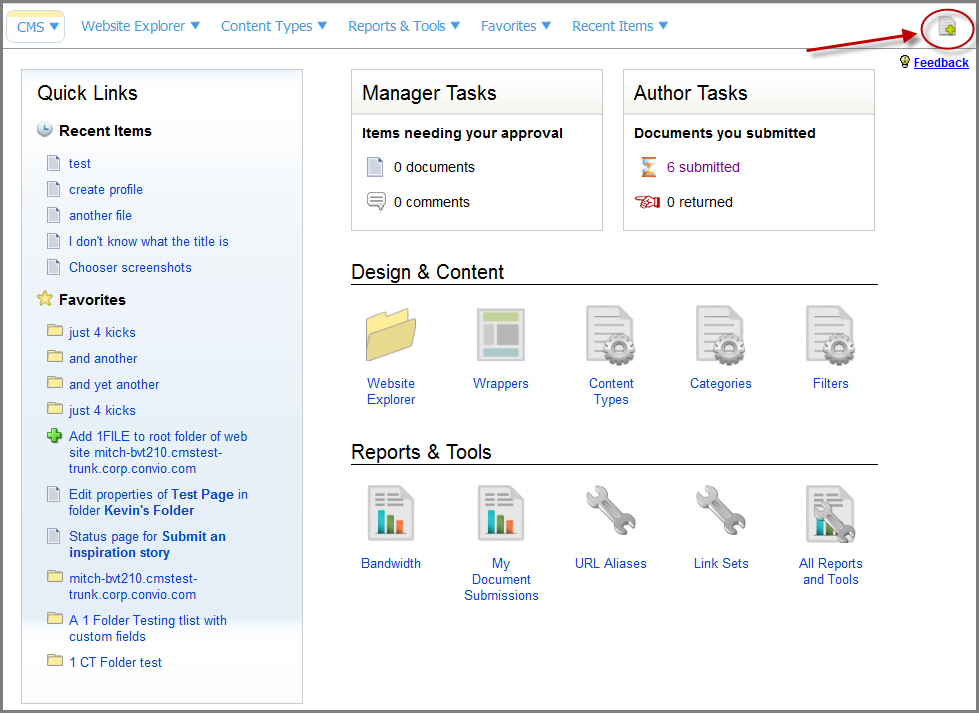
New Luminate CMS Banner and Menu Bar
New Banner and Menu Bar

- The Log Out link is located in this drop-down menu.
- Use this drop-down menu to switch to a different host.
- The toggle to switch between Luminate CMS and Luminate Online is in this drop-down list.
- A new Create Content button has been added here.
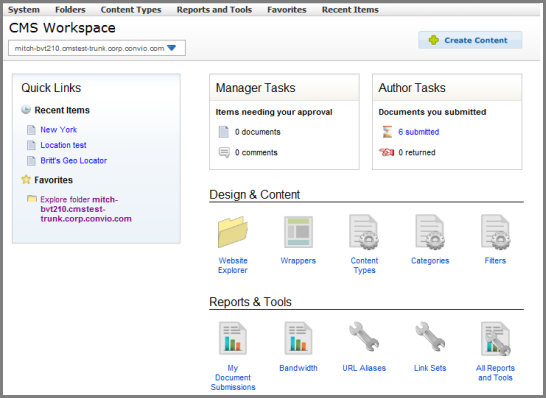
Old Banner and Menu Bar

Redesigned Workspace Page
The Workspace has been slightly changed since the last release. The most notable change is the look and location of the Create Content button. It is now located in the upper, right-hand corner.
New Workspace
Previous Workspace
User-Generated Content Forms
Authors can now build Create Content forms that allow constituents to submit personal stories, blog posts, PDF files, and more to your organization's website. When a constituent submits something, they create a new content item. Any content item can be used except Comments. Because it is a content item, submissions can be configured for content relationships, dynamic lists, search, and workflow. In addition, each user-generated submission can be noted in the Constituent Profile through a new Content interaction field. You can also configure the form so that, if a user uploads both a story and an image for example, the story content item and the image content item become related items.
A significant difference between building a Create Content form and building a regular, data entry form, is that the Create Content form fields are created in the Author Entry Form of a separate content item. A new section has been added to the Properties page called Forms. You can create more than one form and they contain the customized fields for the Create Content forms (created later).
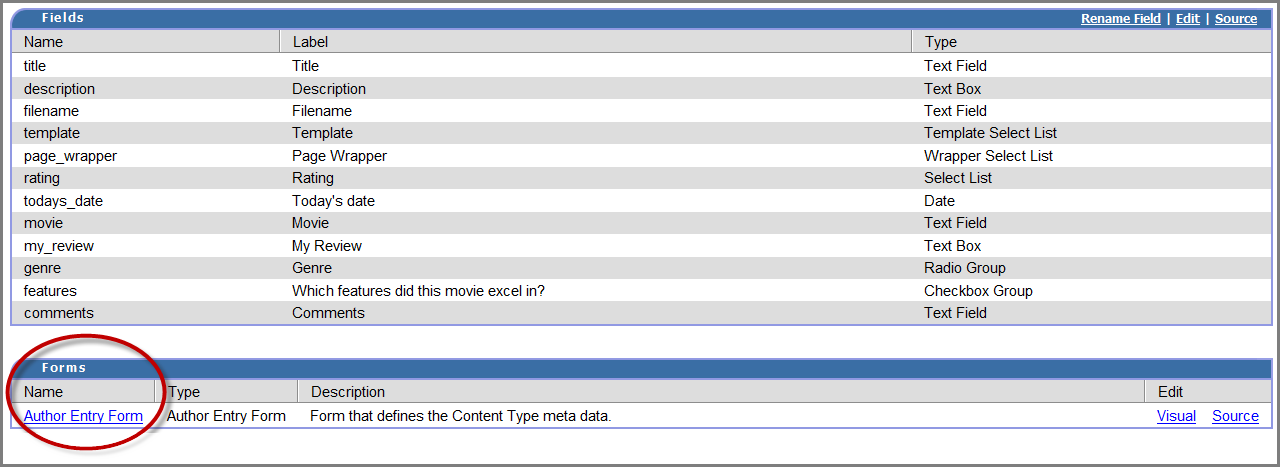
In the Visual Editor, click the Form Tool and select the Create Content form action. At this point, you link the web page to the content item with the fields in the Author Entry form. The Create Content fields are automatically pulled into the Visual Editor from the Author Entry form and you can edit as needed. Submit and Reset buttons are automatically added. Here is what the final form looks like on an the AHS website.

For more information, refer to the online help topic, Enabling Site Visitors to Share Stories, Photos, and More, or the User-Generated Content Feature Summary document.
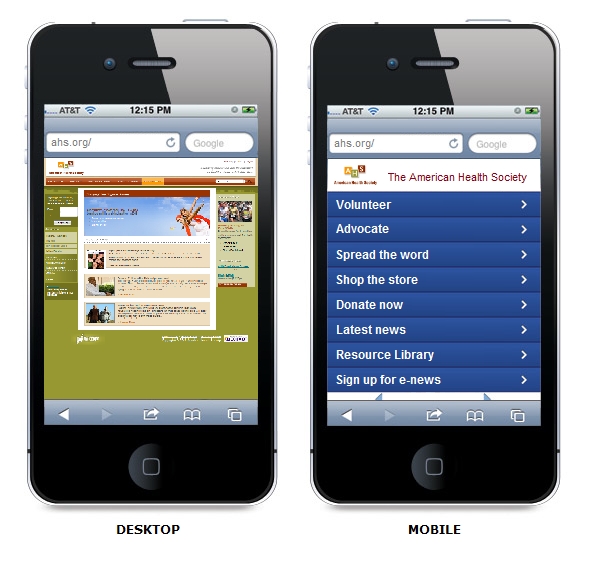
Support for Mobile Devices
You can now configure your site to display content customized for mobile devices. Because you set a wrapper as the default mobile wrapper and a mobile display as your default mobile display template (per content type), you do not have to maintain two separate versions of your site - one for desktop computers and one for mobile devices. In addition, CMS automatically detects the type of mobile device being used to adjust the display accordingly.
To set the default Mobile wrapper, click Reports and Tools > Wrappers. You can only have one mobile wrapper per site.
For more information, refer to the Optimize Luminate CMS Websites for Mobile Devices Feature Summary document.
Create a New Consitituent360 Profile Form
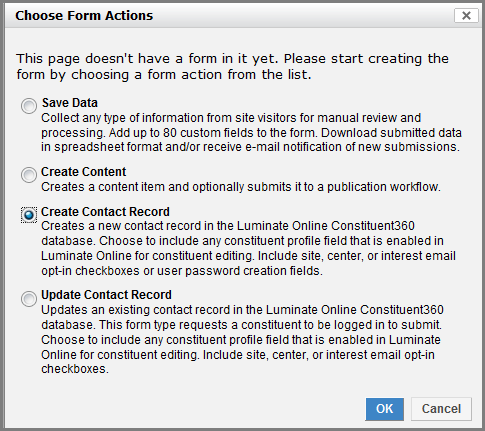
You can now enable your site so that, when a constituent signs up with your organization, they automatically create a Constituent360 profile. You create the form by opening the Form Tool and selecting the Create Constituent Profile action. Any biographical fields that are enabled in the Database Configuration page in Convio Luminate Online are automatically inserted. Remove fields that you don’t want and design the form as needed before publishing. A Captcha field, password creation fields, and an email opt-in field are also added. If any centers or interests are associated with the constituent, you can add multiple, center- or interest-specific email opt-in checkboxes.
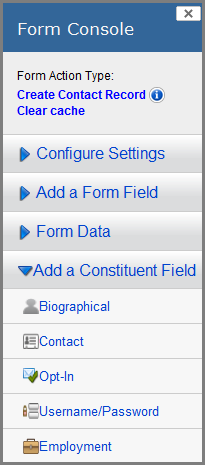
The Form Console contains a new palette called Add a Constituent Field which is only available for Create Constituent Profile and Update Constituent Profile forms. The buttons include Biographical, Contact, Opt-in, Username/Password, Employment, Education, Significant Other, and Custom Fields. These allow you to add additional fields that may not already be in the form. The Opt-In button allows you to add multiple, center-specific and interest-specific email opt-in checkboxes.
For more information, refer to the Create a Constituent360 Profile with Luminate CMS Forms Feature Summary document.
Update Constituent360 Profile Form
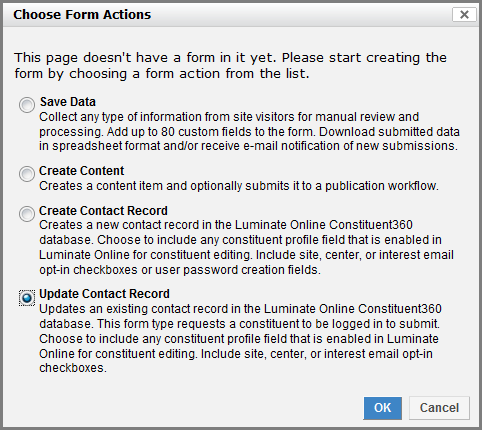
You can also enable your site so that, when a constituent updates their profile online, not only will the fields be automatically populated, but any changes will be made to their Consituent360 Profile. Similar to the way the Create Constituent Profile form are created, you select the Update Constituent Profile form action in the Form Tool. Edit the form as needed in the Visual Editor. The new Add a Constituent Field palette is available for these form types.
For more information, refer to the Create a Constituent360 Profile with Luminate CMS Forms Feature Summary Document.
Updated Form Tool
Updates to the Form Tool include:
- Form Actions
- Location Chooser
- Upload Related Items
- New Password Data Type for Text Fields
For more information, refer to the Luminate CMS Form Console Enhancements Feature Summary document.
Form Actions
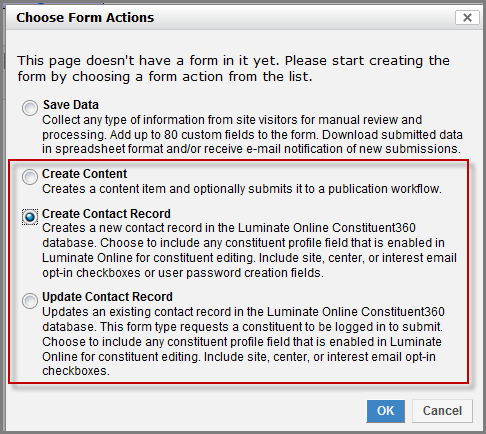
Before you begin to add fields in the Visual Editor, you decide what the form will be used for (the form action). Forms can be used to collect data (the Save Data form), collect user-generated content (the Create Content form), create a new constituent profile (the Create Constituent Profile form), and to update a constituent profile (the Update Constituent Profile form). The Save Data form is the existing form type that is used solely for information-gathering purposes, the results of which can be downloaded as a CSV text file. The Create Content, Create Constituent Profile, and the Update Constituent Profile form actions are explained earlier in this document
New Form Console with Add Constituent Field Palette
The new Add Constituent Field palette is available for Create Constituent Profile and Update Constituent Profile forms.
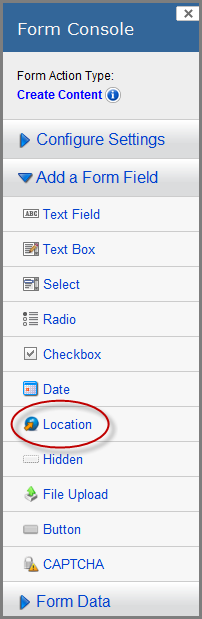
Location Chooser
A new Location button in the Form Console provides an interface to add a geo-location to a Create Content form, making an easier alternative to coding the location.
In the Location Field Properties dialog select the coordinates.

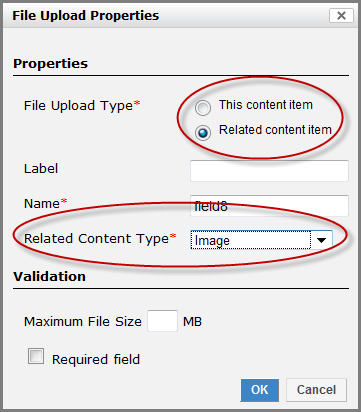
Upload Related Items
The enhanced File Upload button allows you to specify that multiple items uploaded by a constituent automatically become related items. If the content type is an image, for example, you can select other images that the constituent uploads to be related to this one. Or, you can select a different content type to relate to the image content type such as web page. Finally, the File Upload button also allows you to set the maximum upload file size.
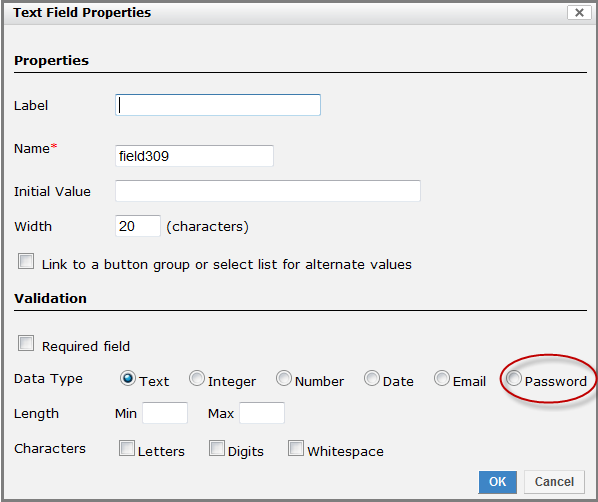
New Password Data Type for Text Fields
The Text Field Properties dialog has a new data type, Password. Use this so that, when a constituent enters their password, the characters are masked by dots.
Fixes
- Previously, Select Lists backed by related items displayed an empty list in the Visual Editor in Firefox browsers only. This has been fixed. (50140)
- Empty anchor tags now display correctly in the Visual Editor when working in Internet Explorer 8.0. (50470)
- You can now edit Luminate CRM content using FireFox on a Macintosh. (53569 )
- When indexing content, the Remote Search Indexer now works even if the URL contains spaces. (54398)
- Previously, workflow assignees continued to receive notifications even after the workflow was disabled. This has been fixed. (54559)
- Pagination controls, the New Item and the New Folder buttons now display in the Item Chooser when working in Internet Explorer 7.0. (54708)
- You can no longer use the name "page" for Content Types as it caused the Pagination Controls component to break. (54760)
- Previously, selecting Folder Properties from the right-click context menu displayed the folder properties of the parent folder and not the selected folder. This has been fixed. (54866)
- Previously, there were inconsistencies across the various Comments reports. This has been fixed. (54933)
- Adding style tags to an Author Entry Form no longer prevents the Related Item and Image choosers from displaying in Internet Explorer 8. (55265)
- We have added Paste as Word and Paste as Plain Text buttons to the Visual Editor for Internet Explorer browsers. (55383)
- Copying a live item with a draft no longer results in the copied item reverting to Draft status. (55715)
- When you exceed the maximum file upload limit, a more user-friendly error message displays. (55854)
- Previously, inline
<form>tags inserted into the body Rich Text Field of the properties page disappeared when editing the content. This has been fixed. (55596) - Previously, you could not save RSS Feed properties in Internet Explorer 8. This has been fixed. (56599 )
Supported Browsers
- Windows® Internet Explorer 8
- Windows® Internet Explorer 7
- Mozilla Firefox 3.x and 4.x (we do not currently support 5.x)
Known Issues
- In Firefox 5.0 or higher, in order for the top navigation bar to display you must clear your cache. (56874)
Privacy Policy | Safe Harbor Notice | Terms of Use | Acceptable Use Policy | © 2012 Blackbaud, Inc. All Rights Reserved